Step-by-Step Guide to Replacing Overhead Service Cables
Ever looked up at the wires connecting your house to the power pole and wondered how long they'll last? Maybe you've noticed some sagging or even signs of damage. Knowing when and how to address issues with your home's electrical connection is crucial for safety and preventing unexpected power outages.
The overhead service wiring, sometimes called the service drop, is the vital link that brings electricity from the utility pole to your home. This connection is responsible for powering everything from your lights and appliances to your HVAC system. Understanding the basics of this system, recognizing potential problems, and knowing when it’s time to consider replacing the overhead lines is essential for every homeowner. In this guide, we'll break down the process, covering safety precautions, essential steps, and when it's best to call in a professional.
Understanding Overhead Service Cables
Overhead service cables are designed to withstand years of exposure to the elements, but they aren't indestructible. They typically consist of multiple wires – usually three – a neutral conductor (often a bare wire) and two insulated conductors (hot wires). These wires carry the electrical current from the utility’s distribution lines to your home’s service entrance, which then feeds into your electrical panel.
Here's what you need to know: Lifespan: Overhead wiring typically lasts for 25-40 years, but this can vary depending on weather conditions, installation quality, and the materials used. Common Problems: Sagging wires, damaged insulation, corrosion, and loose connections are all common issues that can affect the performance and safety of your overhead service. Safety Concerns:Damaged or improperly installed overhead wiring can pose serious electrical hazards, including shocks, fires, and power outages. Always treat these wires with extreme caution.
When to Consider Replacement
Knowing when to replace your residential overhead lines is just as important as knowinghowto replace them. Don't wait until there's a major problem! Proactive replacement can prevent a lot of headaches. Here are some telltale signs: Visible Damage: Cracked, frayed, or missing insulation is a clear indication that the wires are deteriorating and need to be replaced. Sagging Wires: Excessive sagging can put strain on the connections at both the pole and your house, increasing the risk of failure. It also indicates potential weakening of the wires themselves. Corrosion: Corrosion on the wires or connectors can impede the flow of electricity and create a fire hazard. Look for green or white deposits on the metal surfaces. Frequent Power Outages: If you experience frequent, unexplained power outages, it could be a sign of a problem with your overhead service. Consult with a qualified electrician to inspect the system. Age:If your overhead wiring is more than 25 years old, it's wise to have it inspected by a professional, even if you don't see any obvious signs of damage.
Important Note: Replacing overhead wiring involves working with high voltage electricity and requires specialized knowledge and equipment. Unless you are a qualified electrician, it is strongly recommended that you hire a professional to perform this work.This guide is for informational purposes only and should not be considered a substitute for professional advice.
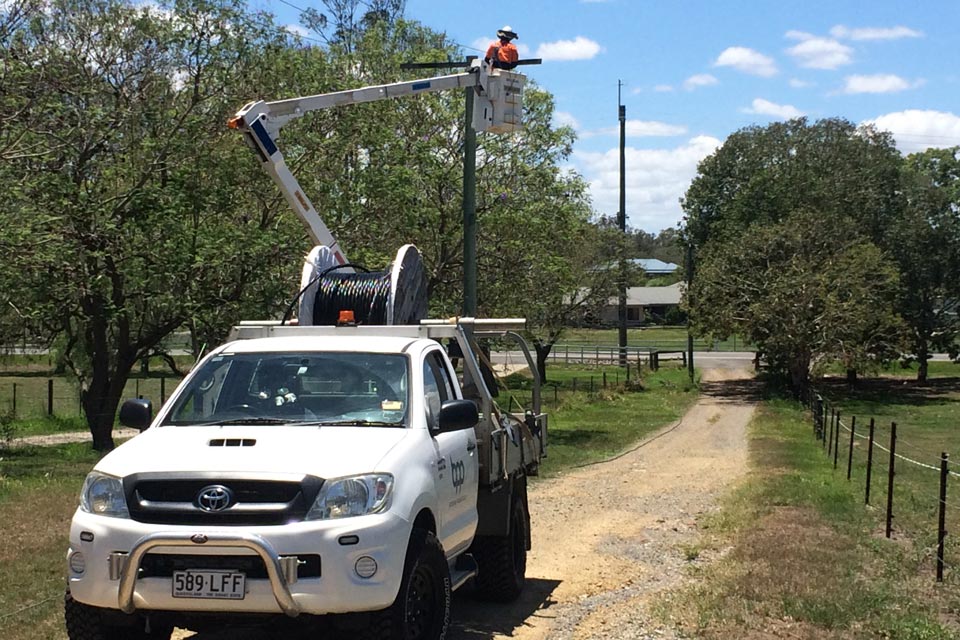
Step-by-Step Guide (For Qualified Electricians Only)
Disclaimer:The following steps are intended for qualified electricians only. Improperly performed electrical work can be dangerous and even deadly.
1.Planning & Permits:
Contact the Utility Company: Before starting any work, contact your local utility company to inform them of your plans. They may need to disconnect the power to your home during the replacement process. They may also need to inspect the completed work.
Obtain Necessary Permits: Check with your local building department to determine if you need a permit for this type of work.
Plan the Route: Carefully plan the route of the new overhead wiring, ensuring that it is clear of obstructions and meets all applicable codes.
Gather Materials: Ensure you have all the necessary materials on hand, including the correct gauge of wire, insulators, connectors, and grounding hardware.
2.Safety First!
Verify Power is Off: Using a voltage tester, confirm that the power is disconnected at both the utility pole and your home’s service entrance. Double-check!
Wear Appropriate PPE: Wear insulated gloves, safety glasses, and other appropriate personal protective equipment (PPE) to protect yourself from electrical hazards.
Use Insulated Tools: Only use tools that are specifically designed for electrical work and are properly insulated.
Establish a Safety Zone: Clear the work area of any obstructions and establish a safety zone to prevent unauthorized access.
3.Removing the Old Wiring
Disconnect at the House: Carefully disconnect the old overhead wiring from your home’s service entrance, taking care to avoid damaging the existing components.
Disconnect at the Pole (Utility Personnel):Do not attempt to disconnect the wiring from the utility pole yourself.This is the responsibility of the utility company. They will disconnect the wires at the pole.
Remove the Old Wiring: Once the wires are disconnected at both ends, carefully remove them from the insulators and other hardware. Dispose of the old wiring properly.
4.Installing the New Wiring
Install New Insulators (if needed): Replace any damaged or worn insulators on your house and the utility pole.
Attach Wiring to Insulators: Carefully attach the new overhead wiring to the insulators, ensuring that it is properly secured and that the wires are not touching any trees or other objects.
Connect at the House: Connect the new overhead wiring to your home’s service entrance, following all applicable codes and regulations. Ensure all connections are tight and secure.
Utility Connection (Utility Personnel): Again, the utility company will handle the connection of the new wiring to the utility pole.
5.Grounding
Ensure Proper Grounding: Verify that your home’s grounding system is properly installed and connected to the neutral conductor of the overhead service. This is crucial for safety.
6.Inspection and Testing
Visual Inspection: Carefully inspect all connections, insulators, and wiring for any signs of damage or improper installation.
Voltage Testing: Once the utility company has restored power, use a voltage tester to verify that the voltage is correct at your home’s service entrance.
Load Testing: If possible, perform a load test to ensure that the overhead service can handle the electrical demand of your home.
Cost Considerations for Replacing Your Service Drop
The cost of replacing overhead wiring can vary widely depending on several factors, including: Wire Gauge and Length: Longer runs and thicker gauge wires will increase the material costs. Accessibility: If the utility pole is difficult to access, it can increase the labor costs. Local Labor Rates: Electrician labor rates vary by region. Permit Fees: The cost of permits can vary depending on your local building department.
Generally, you can expect to pay anywhere from \$500 to \$2,000 or more for a complete overhead wiring replacement. It's always best to get quotes from several qualified electricians to compare prices and services. Also, be sure to ask what is included in the quote (permits, labor, materials, etc.)
Maintenance Tips for Overhead Wiring
While overhead wiring is designed to be durable, there are a few things you can do to help extend its lifespan and ensure its safe operation: Keep Trees Trimmed: Regularly trim any trees or bushes that are growing near the overhead wiring to prevent them from rubbing against the wires and causing damage. Inspect Regularly: Periodically visually inspect the overhead wiring for any signs of damage or corrosion. If you see anything suspicious, contact a qualified electrician. Don't Hang Anything on the Wires: Never hang anything on the overhead wiring, such as decorations or holiday lights. This can damage the wires and create a safety hazard. Professional Inspections: Consider having a qualified electrician inspect your overhead wiring every few years to identify any potential problems early on.
People Also Ask: Common Questions About Overhead Service Wiring
How do I know if my overhead wiring is the right size?
The correct size of overhead wiring depends on the electrical load of your home. A qualified electrician can perform a load calculation to determine the appropriate wire gauge for your needs.
Can I bury my overhead wiring instead of replacing it with new overhead wiring?
Yes, you can often bury your overhead wiring, but this is a more complex and expensive project. It requires trenching, installing conduit, and coordinating with the utility company. It's best to consult with a qualified electrician to determine if this is a feasible option for your home.
What happens if my overhead wiring falls down?
If your overhead wiring falls down, stay away from it and immediately contact your local utility company. Do not attempt to touch or move the wires yourself, as they may still be energized.
Conclusion
Dealing with overhead service cables may seem daunting, but with the right knowledge and precautions, you can ensure the safety and reliability of your home's electrical supply. Remember, electrical work can be dangerous, and it's always best to err on the side of caution. When in doubt, call a qualified electrician. By staying informed and proactive, you can keep your home powered safely and efficiently for years to come. Now you have a solid grasp on how to approach maintaining and, when necessary, addressing the overhead wiring that keeps your lights on.
Posting Komentar untuk "Step-by-Step Guide to Replacing Overhead Service Cables"